Manually Installing IntraLaunch
Current Extension Version: 6.0.76
Current Connector Version: 6.0.7
A web browser compatible with Chrome's extension architecture is required. This will soon be the
top four major browsers. Simply install the Extension first, then the Connector. Once installed you may
view the demonstration section to confirm
operation and see it in action.
|
1 - Download Extension
First download the extension file below. This allows you to install/deploy the IntraLaunch extension to multiple browsers within your organization. You will receive a .CRX file. Possibly right click and Save link as... or you may receive a download warning. Download Extension (.crx) File |
|
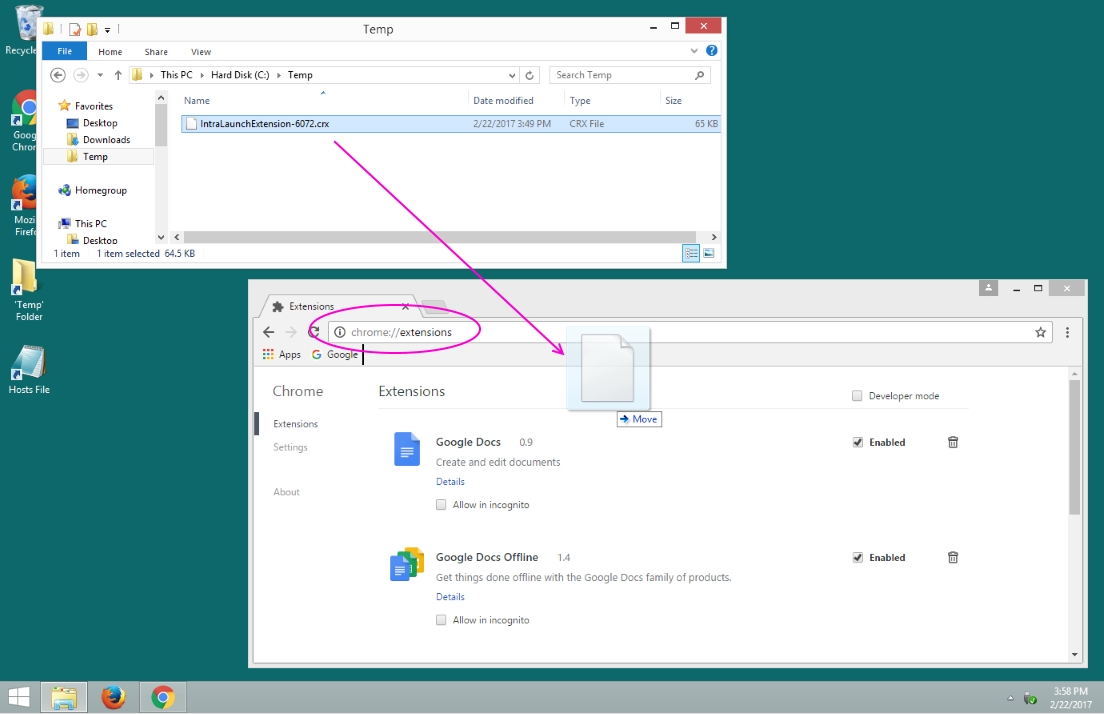
2 - Manually Install Extension
Within Chrome go to your Extensions list by enter "chrome://extensions/" within your address bar. Then drag the .crx file from [1] into the list to install it. Developer mode does not need to be enabled. See the screenshot for an example. Note the actual IntraLaunch extension (this .crx file) is the same for the trial and licensed version of IntraLaunch and does not need licensing. Only the Connector does. |
|
3 - Install Connector
This small program must be install for IntraLaunch to work properly. It is a 1.1Mb MSI installable file. You may easily deploy this .MSI file across your organization to many workstations as you typically would, for example via Active Directory or System Center Configuration Manager. Download Connector |
|
3 - Try it out
Once installed the demonstration section will test your setup and demonstrate all the available features. You can also directly use the Installation Check to test your workstation. View Demonstration |